DIY Product Photography: Guide for New Photographers & Brands
First impressions often come from a single image in today’s competitive online marketplaces. For small business owners and startup brands, investing in high-end professional product photography isn't always an option. Tight budgets and limited resources can make it difficult.
But that doesn’t mean your product photos should look amateur.
High-quality visuals are essential. They help build trust, enhance your brand's credibility, and drive sales. Whether you're selling skincare, handmade crafts, or lifestyle products, clear and well-lit photos make your brand look polished and professional.
The challenge is real. You're competing with big brands that have in-house photographers and full creative teams. To stand out, your DIY product photos need to be consistent, intentional, and visually appealing.
This guide is here to support small business owners, solo entrepreneurs, and beginner photographers. It provides practical steps to create professional-looking product photos using simple tools and a creative approach.

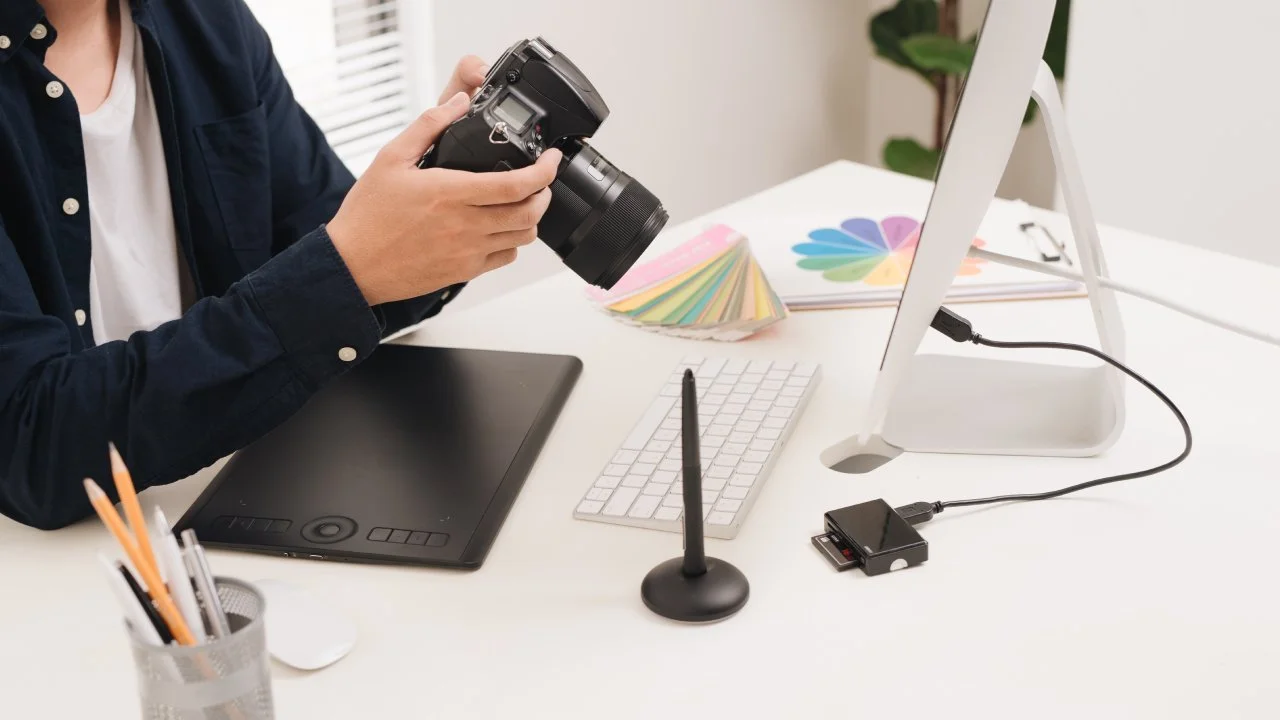
Finding a Photography Setup That Works for You
Creating professional-looking product photos at home starts with a setup that suits your space, lighting, and budget. Before you start shooting, it's important to understand how to work with what you have and avoid common pitfalls that can hurt the quality of your images. Let’s explore how to make the most of your environment.
Limited Space
You don’t need a fancy studio or extra room to take great product photos. Many successful small brands shoot stunning images right from their living rooms, bedrooms, or even kitchen counters. The key is to dedicate a small and consistent space where you can control your setup.
Use a folding table, a sturdy chair, or even a windowsill as your shooting surface. Keep your gear compact and organized so you can easily set up and tear down as needed. For storage, consider a rolling cart or a small shelf to hold props, backdrops, and lighting gear.
Real businesses do this every day. Handmade skincare sellers shoot in bathrooms with natural light. Jewelry brands create setups in closets using foam boards and clamp lights. It’s all about being resourceful with what you have. If you're just getting started, this guide to launching a home-based studio photography business offers step-by-step tips on building a space that works.
Lighting Challenges
Lighting can make or break your photos. Home environments often come with inconsistent light, especially if you rely on windows that change throughout the day. Overhead lights usually cast harsh shadows and color tones that don’t flatter your product.
Natural light is your friend. Shoot near a large window with sheer curtains to diffuse light. Mornings and late afternoons usually offer the best soft lighting. Can’t rely on daylight? Build a simple DIY lightbox using white poster boards and LED lamps. This helps eliminate shadows and keeps lighting balanced and even.
With a bit of trial and error, you can create a lighting setup that’s reliable, repeatable, and professional-looking. Get more tips here.
Backgrounds and Clutter
One of the most common DIY mistakes is shooting with clutter in the frame. Distracting elements like cords, furniture, or busy countertops can take attention away from your product.
Keep it simple. Use affordable white foam boards, poster paper, or peel-and-stick vinyl backdrops to create a clean shooting surface. For lifestyle images, make sure props are intentional and on-brand. Less is often more.
Even a neutral bedsheet, a clean tabletop, or a painted wooden board can give your photos the polish they need. The goal is to draw focus to your product, not the surroundings.
A clean and controlled setup builds trust and helps customers focus on what matters and that is your product.
Overcoming Budget Constraints
Professional photography gear can deliver outstanding results, but it’s not always the first step for every brand.
High-end cameras and lighting equipment offer more control and flexibility. They are excellent long-term investments for photographers who want to scale their work. However, that doesn’t mean you can’t produce great results with more accessible tools.
Modern smartphones have powerful cameras capable of capturing sharp, high-resolution images. When combined with good lighting and a steady setup, your phone can deliver product photos that look polished and professional. For those looking to upgrade, entry-level DSLR or mirrorless cameras are available at reasonable prices and provide a solid foundation for learning manual settings.
Rather than focusing on gear first, it’s more effective to focus on mastering the basics like lighting, angles, and composition. These fundamentals matter just as much as the equipment you use.
DIY Solutions
You don’t need to buy every tool listed in a photography gear guide. Many high-priced items can be replaced with budget-friendly alternatives that produce similar effects. For example, a piece of white foam board can act as a reflector to soften shadows. A cardboard box lined with white paper can serve as a lightbox for small products.
Common household items that work well in DIY setups include:
White sheets or curtains to diffuse natural light
Desk lamps fitted with daylight bulbs
Poster boards or contact paper for clean backgrounds
Books and boxes to prop up products
Aluminum foil or mirrors to reflect light
These simple tools can help you build a functional home setup while you develop your skills and prepare for more advanced gear in the future. The goal is to get started with what you have and improve steadily over time.
Struggles of Capturing the Product’s True Essence
Capturing the true essence of a product through photography is one of the most challenging aspects of DIY photography. Let’s explore some common struggles and how to overcome them.
How to Showcase Product Features Effectively
When taking photos, focus on what makes your product unique, whether that’s texture, shape, color, or another standout feature.
Here are some tips for effectively showcasing your product’s best features:
Angles: Experiment with different angles. For example, a side shot can add depth to a product, while a top-down shot is perfect for flat products like clothing or food.
Close-ups: Use close-up shots to highlight texture and glow. For example, if you’re photographing body oil, a close-up can emphasize its dewy finish or luxurious sheen on skin.
Lighting:
Side lighting can enhance texture and depth, giving your photos more dimension.
Soft lighting is ideal for smoothing out imperfections and bringing out the true color of your product.
Reflective Surfaces: For products with reflective surfaces, such as glass or metal, make sure to position your light sources carefully to avoid glare while still showing the key features.
Framing and Composition
Another significant struggle for DIY photographers is ensuring the product is framed correctly and positioned in a way that’s visually appealing and accurate. Shot framing is equally important for both single items and product ranges. Here are some tips to help with framing and composition:
The Rule of Thirds:
Divide the frame into three equal parts, both horizontally and vertically.
Place the product at one of the intersection points for a balanced and dynamic shot.
Simplicity is Key:
Avoid cluttered backgrounds that could distract from the product. Simple and neutral backdrops keep the focus where it belongs.
For lifestyle shots, use props sparingly. Ensure they complement the product without stealing attention from it.
Consistency:
Keep your setups consistent across different products. For example, maintain the same type of background, lighting, and framing to create a cohesive look for your brand. This consistency will help your brand appear professional and polished across all your product images.
Before moving on to the next shot, take a moment to review your frame. When the angle, focus, or alignment seems imperfect, make corrections to achieve a clean, polished result.
Post-Processing and Editing Hurdles
A common fear among small business owners and beginners is that photo editing is too complex and time-consuming. The idea of spending hours perfecting each image can feel discouraging, especially when you're managing multiple tasks in your business. Here are some tips to simplify the process:
Use Simple and User-Friendly Editing Tools:
There are many beginner-friendly editing tools that allow you to enhance your photos without the steep learning curve of advanced software. Tools like Canva, Snapseed, and Fotor are great for quick edits, offering features such as:
Cropping: Trim unnecessary parts of the photo for a cleaner composition.
Adjusting Brightness and Contrast: Easily fine-tune your image to make the product pop.
Applying Filters: Quick filters can help create a consistent look across all your images. Simplify product edits with pre-designed Natural Editing Packs for quick and polished results.
Removing Backgrounds: Tools like Canva’s background remover can quickly isolate your product.
Don’t feel the need to make drastic changes. Sometimes, small adjustments to brightness, contrast, and saturation can make a significant impact without going overboard.
How to maintain consistency across your images:
Consistency in your product photos is key to building a strong and cohesive brand image. Without it, your online store or social media presence can look disjointed and unprofessional.
Businesses often struggle with maintaining a consistent style because of varying lighting, angles, or post-processing techniques, but it’s entirely possible to create a uniform look with a little planning. Here’s how to maintain consistency across your images:
1. Use Presets or Filters:
Editing software like Adobe Lightroom allows you to create or use preset filters that apply the same settings across all your photos. This ensures that your images have a similar color tone and lighting.
2. Standardize Your Editing Process:
Create a simple workflow for editing your photos. Always adjust the same settings in the same order, from exposure to contrast, saturation, and sharpness. This will help ensure that all your images follow a uniform style.
3. Create a Visual Style Guide:
Set clear guidelines for your product images. This can include things like background colors, the type of lighting to use, and how much editing is done. If you plan to outsource photo editing in the future, having a guide ensures that your photos stay consistent.
Endnote
Taking charge of your product photography can be a game changer for small business owners. Not only does it allow you to cut down on costs, but it also gives you full control over your brand’s visual identity.
By implementing the tips shared in this guide, you can significantly enhance the look of your product photos, improve your branding, and ultimately create a more professional online presence that resonates with your customers.