Crafted for Adventure: How to Shoot Outdoor Whiskey Lifestyle Images
Whiskey is not just a drink; it's a symbol of adventure, craftsmanship, and a certain rugged elegance. In recent years, the concept of outdoor whiskey lifestyle photography has gained significant traction among brands aiming to connect with consumers on a deeper, more experiential level. These images evoke a sense of exploration, freedom, and the pursuit of quality, making them a powerful tool in brand storytelling and marketing.

All imagery featured created by Mainstream Multi-Media
What is Lifestyle Photography? The Appeal of Outdoor Whiskey!
The allure of whiskey lies not only in its taste but also in the lifestyle it represents. Outdoor whiskey lifestyle images resonate with consumers by transporting them into aspirational scenarios. We want them to feel compelled to jump into our scene. Whether it's a dram of whiskey by a campfire or a sip overlooking a breathtaking landscape, these images evoke emotions tied to exploration and appreciation of the finer things in life.

Planning Your Outdoor Whiskey Photoshoot
To create captivating outdoor whiskey images, start with the essentials:
✔️Select a moody location that complements the brand's vibe and target audience.
✔️Consider the time of day for optimal lighting. (We prefer the rich hues and contrast that begin at the golden hour)
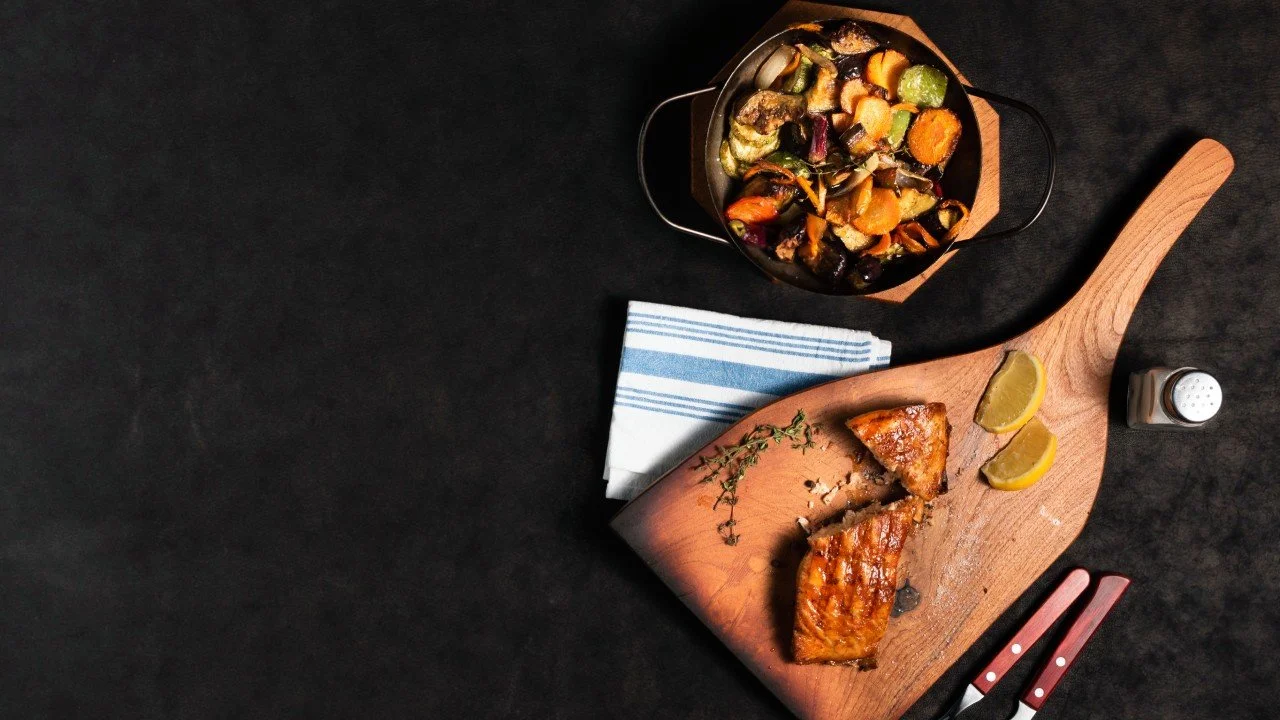
✔️Plan props and styling elements such as snack trays (carb-based items are most fitting), outdoor decor and social lighting (candles, string light, etc.).
Setting the Scene: Creating Atmosphere
In outdoor whiskey lifestyle photography, the ambiance and atmosphere should feel as genuine as the liquor. Focus on using natural elements like wooden benches, stone bridges, and fire pits to maintain a rugged feel throughout your images. To keep your images from feeling “too styled” follow these 3 tips:
✔️ Use a mix of materials like linen, wood, glass, and metal.
✔️ Prioritize different shapes, sizes, and colors when choosing serving trays
✔️ Have an assortment of 2-3 whiskey glasses that you can interchange throughout the shoot
Pro Tip- There are many state parks that offer fantastic views of mountains, forests, and bodies of water that make perfect backdrops!

Choosing the Right Whiskey and Glassware
When selecting a whiskey glass for your outdoor lifestyle images, it's essential to be deliberate in your approach. Consider the specific presentation of the whiskey—is it being enjoyed neat, on the rocks, or as part of a cocktail? The choice of glass can significantly influence how the whiskey appears in your outdoor images.
Opt for glassware that complements the whiskey's color and texture, enhancing its visual appeal. For darker or richer whiskeys, consider using a clear, wide-mouthed glass to showcase the drink's depth and complexity. Conversely, lighter whiskeys may benefit from a narrower glass that concentrates aromas and highlights subtleties.
Pro Tip: Pay attention to details such as the thickness of the glass, which can affect how light interacts with the whiskey, creating captivating reflections and refractions.
Capturing Action Shots and Candid Moments
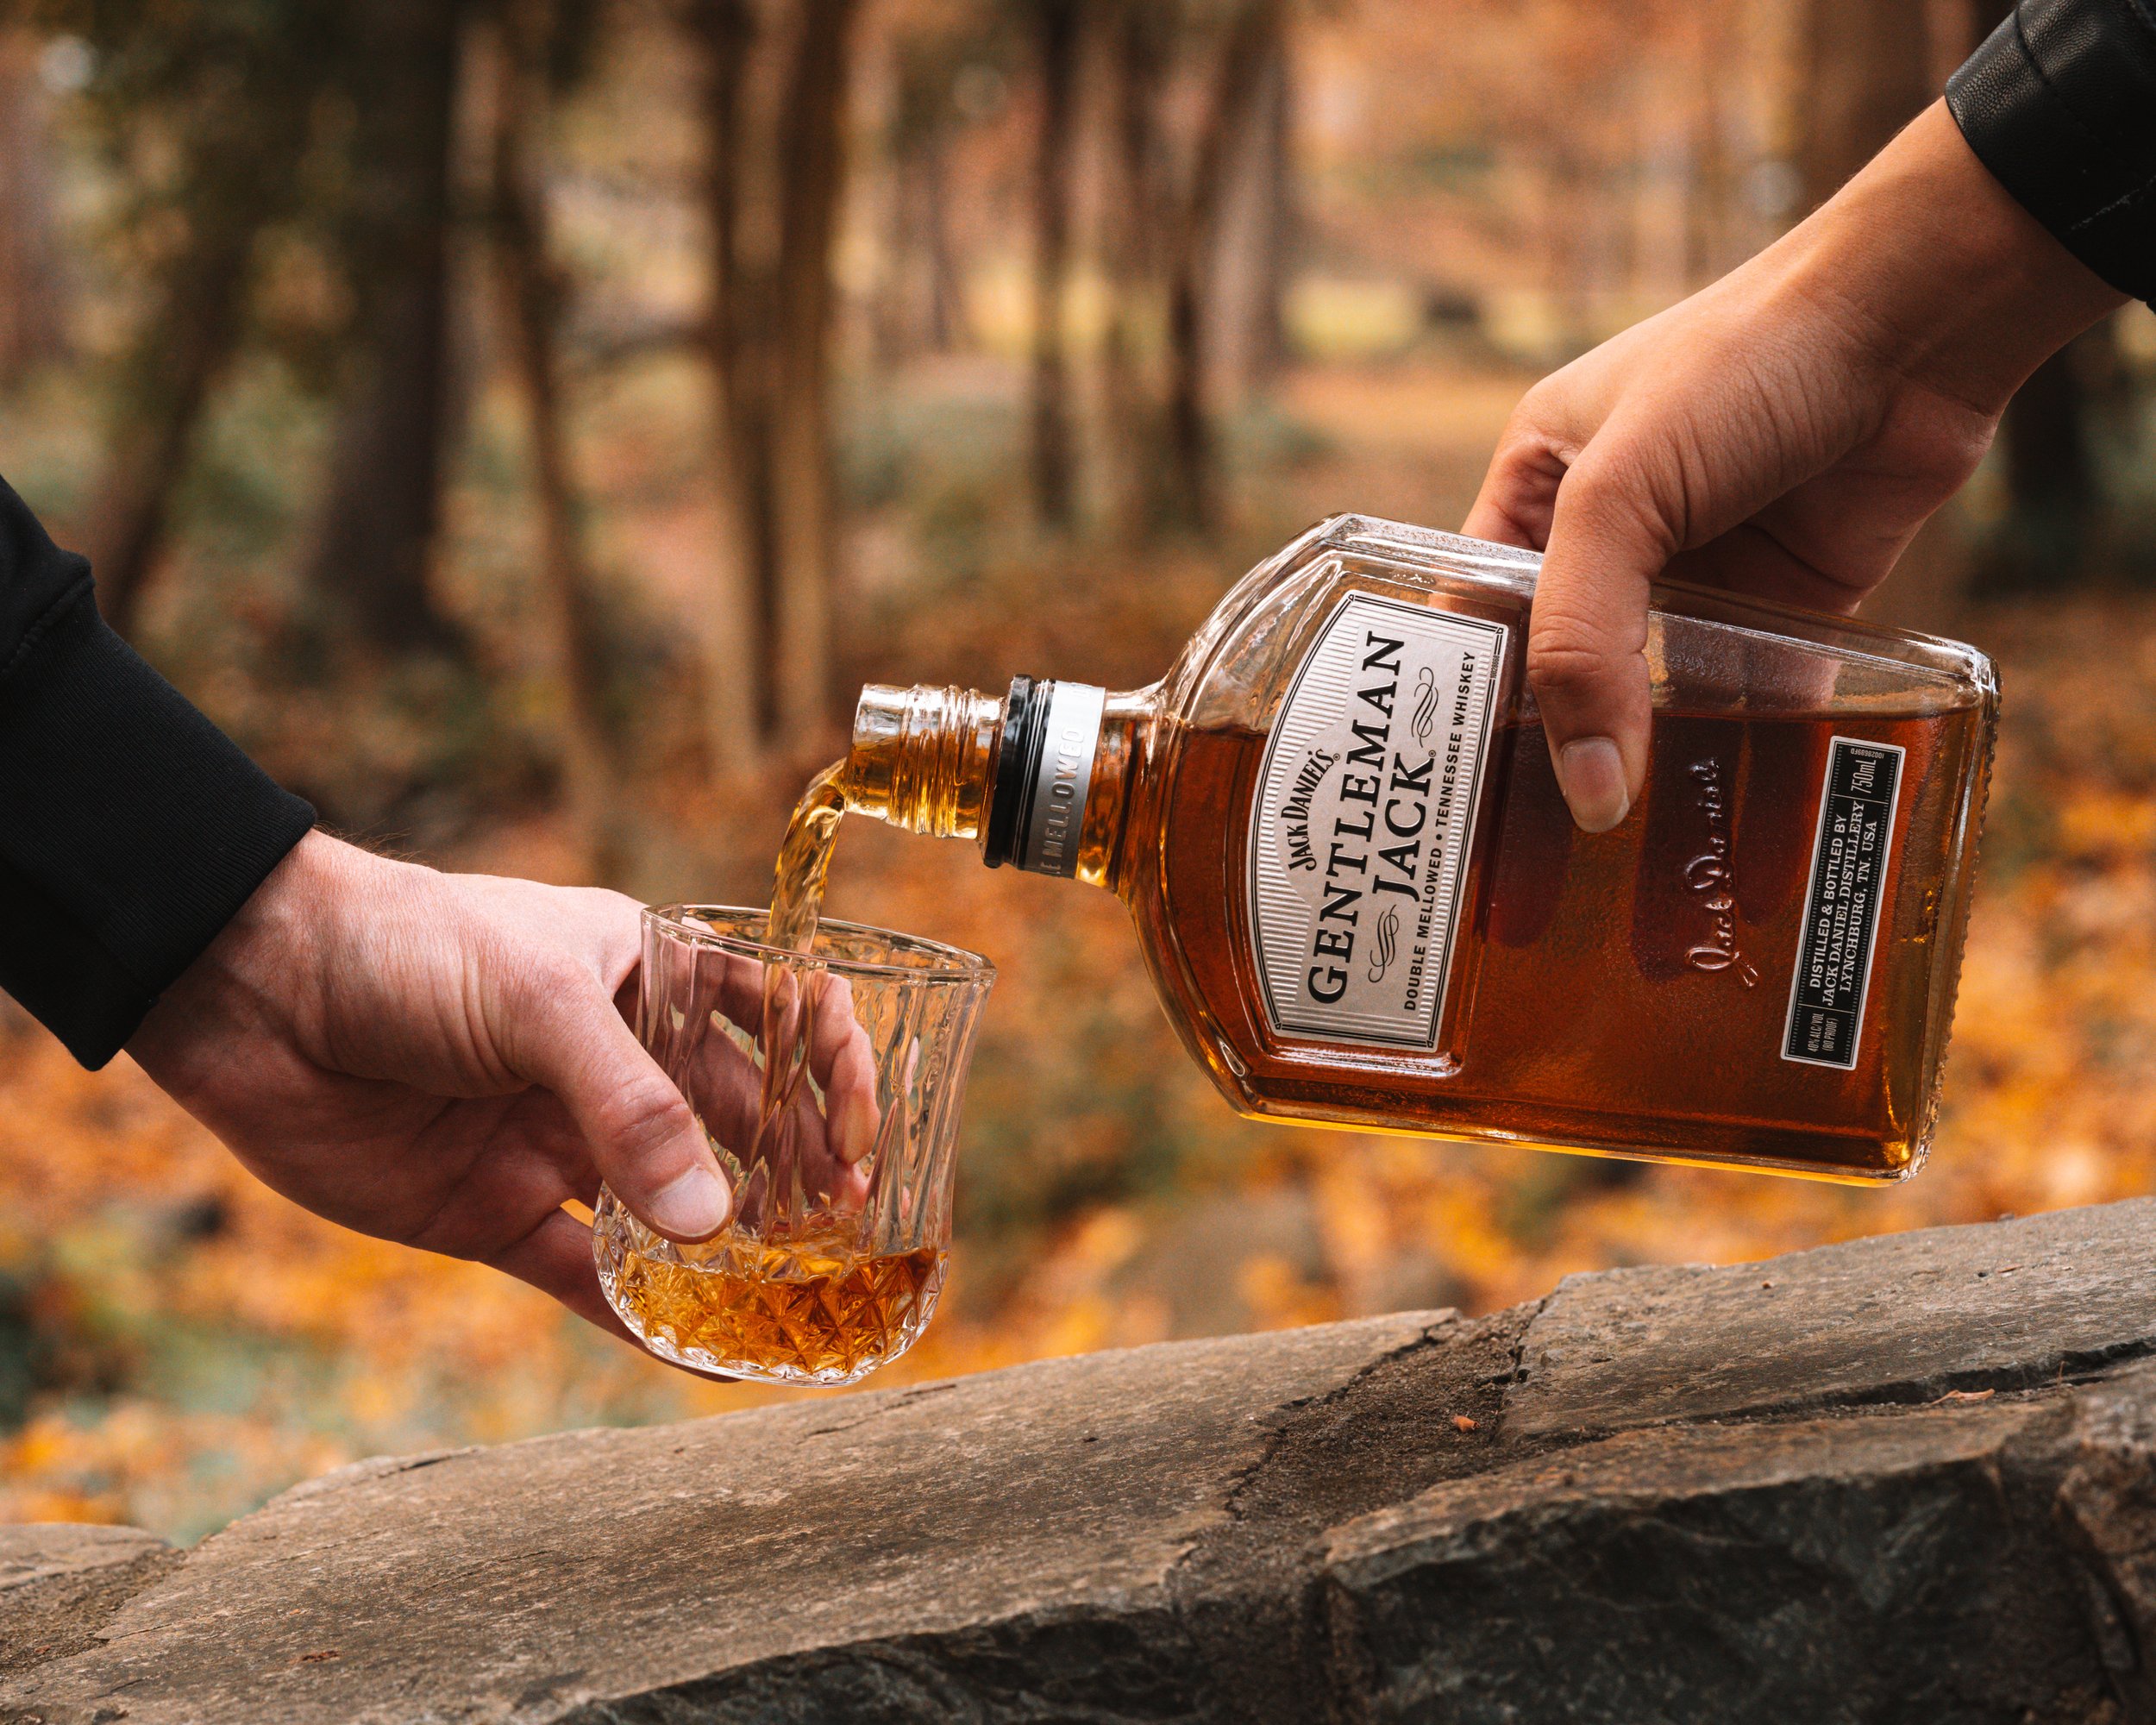
Add life to your images by capturing action shots such as pouring whiskey into a glass or sharing a drink with friends. Candid moments that reflect genuine enjoyment can create relatable narratives that resonate with viewers.
Doesn’t this shot make your mouth water? 🤤

Free Mini-Course
Learn How to Make 6-Figures Creating Content for Dream Brands
Technical Aspects of Outdoor Photography
Consider using a mirrorless camera like the Sony A7III, known for its exceptional image quality. It’s important that even when shooting at a distance, the image can still be cropped small and retain quality. For every outdoor lifestyle product photography shoot, we always bring two lenses: a standard and a macro lens. This gives us the versatility to capture larger scenes and close-up details like the color and texture of whiskey.

Outdoor Lifestyle Photography Gear:
How To Edit Outdoor Lifestyle Whiskey Images
Post-processing plays a crucial role in enhancing the warmth and vibrancy of your outdoor whiskey lifestyle photos. Follow these editing tips to bring your images to life:
1. Adjust White Balance: Start by adjusting the white balance to achieve warm tones that complement outdoor lighting. Experiment with temperature and tint sliders to infuse a golden hue into your images, simulating the inviting glow of sunset or golden hour.
2. Enhance Colors and Contrast: Boost the saturation and vibrancy of colors, particularly the amber tones of whiskey, to make them visually appealing and inviting. Use selective adjustments to fine-tune specific color ranges, ensuring the whiskey retains its natural appearance while enhancing richness.
3. Add Warmth with Split Toning: Apply split toning to add warmth to shadows and highlights separately. Use warm hues like orange or yellow in the highlights and deeper tones like amber or brown in the shadows to create a cohesive, inviting atmosphere.
4. Use Gradient Filters for Lighting Effects: Apply gradient filters to control exposure and add emphasis to specific areas of your image. Enhance warm lighting effects by selectively brightening or darkening parts of the scene, guiding the viewer's focus to the whiskey and enhancing the overall ambiance.
5. Incorporate Texture and Detail: Enhance the texture and detail of whiskey bottles and glassware to make them appear more tactile and lifelike. Use clarity and sharpening tools judiciously to maintain a natural look while accentuating fine details.
6. Experiment with Presets and Custom Profiles: Explore pre-made presets or create custom editing profiles tailored to outdoor whiskey photography. Save time by applying consistent adjustments across multiple images, ensuring a cohesive and professional look.
7. Maintain Authenticity: While enhancing warmth and vibrancy, strive to maintain the authenticity of outdoor settings and whiskey products. Avoid over-editing that can make images appear artificial or unrealistic, preserving the natural charm of outdoor whiskey lifestyle photography.

FAQs
How can whiskey brands get outdoor lifestyle product images for their products?
Speak to a professional like Mainstream Multi-Media which specializes in captivating product images, videos, and stop-motions!
What gear is essential for an outdoor whiskey photoshoot?
Essential gear includes a DSLR camera, standard lens, and macro lens.
How do you find suitable outdoor locations for whiskey photography?
Look for locations that align with the brand's identity, such as scenic landscapes, public outdoor recreational areas, or state parks.
How do I edit outdoor lifestyle whiskey product Images?
Editing techniques that enhance natural colors, textures, and mood while preserving authenticity are ideal for outdoor-themed whiskey images.
How can lifestyle images influence consumer perception of whiskey brands?
Lifestyle images create aspirational connections, influencing consumers to associate the brand with adventure, quality, and enjoyment.
More Articles