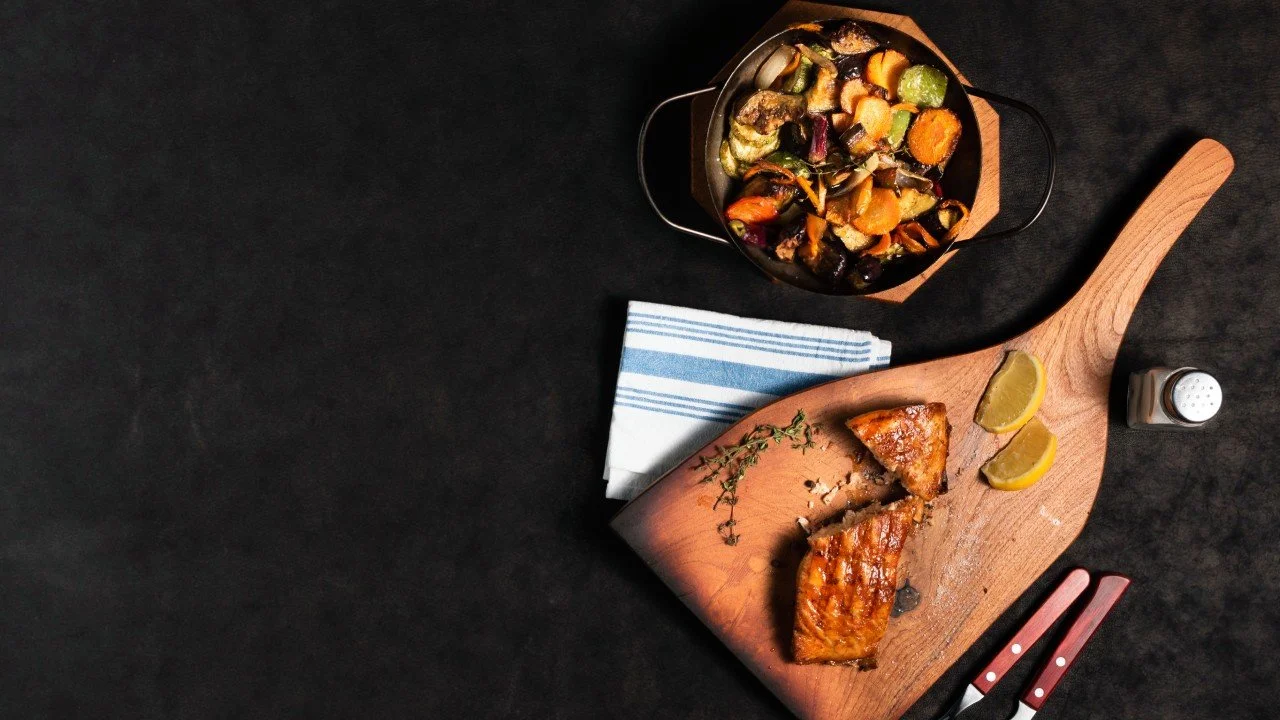
Ultimate Guide to Dark and Moody Food Photography
Imagine capturing a simple plate of food and turning it into a captivating visual story that speaks of warmth, mystery, and depth. This is the power of dark and moody food photography. It is not just about lighting and angles, but about creating an atmosphere. Shadows and contrast transform a mundane meal into something truly dramatic.
I’m Brittany Lafave, and I help brands build powerful product visuals that resonate with their audience. If you’re drawn to the bold and the unexpected, you’re in the right place. This guide will help you master the techniques needed to give your food photography a powerful and emotive edge. Ready to dive into the world of dark and moody imagery? Let’s get started.
Principles of Dark and Moody Food Photography
Dark and moody food photography is a striking visual style that relies heavily on shadows, low lighting, and high contrast to create a sense of drama and depth. Unlike traditional bright, airy food photography, this style embraces the darker elements, making food appear more substantial, mysterious, and rich.
Here are the essential characteristics that define dark and moody food photography:
Use of Shadows: Shadows play a crucial role in shaping the atmosphere. Rather than illuminating every part of the scene, shadows are used to conceal parts of the image, making the visible details pop.
Low Lighting: Soft and diffused light is essential in creating depth and enhancing the mood. The light is often placed at an angle to create a sense of drama, highlighting textures and giving the food a three-dimensional feel.
High Contrast: A striking difference between light and dark areas brings intensity and focus to specific details. This contrast highlights the rich colors and textures of the food.
Color Palette: The colors used in dark and moody photography tend to be deep and rich, with earthy tones like dark browns, blacks, and deep greens. These colors complement the shadows and contrast, enhancing the overall mood.
Texture Emphasis: The play of light on surfaces enhances the texture of the food. Whether it’s the sheen of a glaze, the roughness of bread crust, or the smoothness of chocolate, the textures become much more prominent in this style.
Mood Creation: This style is all about creating a specific mood, whether it’s warmth, mystery, or elegance. The interplay of lighting, color, and shadows helps establish a connection with the viewer, making them feel something beyond just viewing the food.
Historical Influences
The origins of dark and moody photography can be traced back to classical art and the Baroque still life paintings of the 17th century. These works often featured food, drink, and everyday objects arranged in dark and shadowy compositions with dramatic lighting.
Artists like Caravaggio used strong contrasts between light and shadow. It is a technique known as chiaroscuro to create a sense of depth and realism. The intense shadows and highlights in these paintings highlighted the texture, weight, and material of objects, and brought them to life in a way that was almost photographic.
This technique translated into modern photography, particularly in food imagery, where the same principles are used to give food a sense of importance and intimacy. The dark backgrounds and harsh contrasts used in Baroque art are reinterpreted in food photography, giving everyday ingredients a visual weight that makes them seem more substantial and worthy of attention.
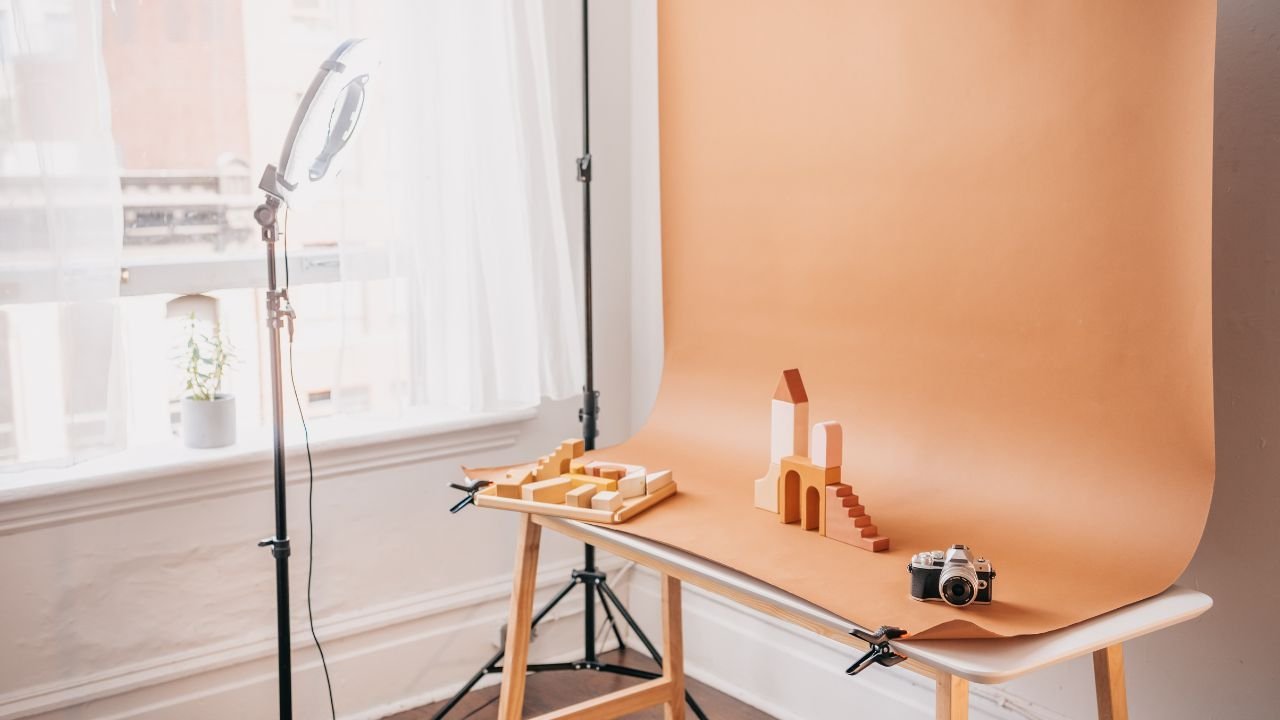
Setting Up Your Dark and Moody Food Photography Studio
Creating dark and moody food photography requires setting up your studio to work in harmony with your vision. From the right lighting to choosing the perfect props, each element contributes to crafting the mood and depth that defines this style. Here’s a guide on how to create a space that brings your dark and moody shots to life.
Choosing the Right Lighting
Lighting shapes how the food appears, defines textures, and plays a key role in creating that atmospheric mood. In dark and moody photography, the goal is not to flood the scene with light but to carefully control it.
Natural vs. Artificial Lighting:
Both types of lighting can work for dark and moody food photography, but each has its own advantages.
Natural Lighting:
When using natural light, it's important to control the light coming from windows. Soft and diffused light is ideal for this style. You can achieve this by using curtains or sheer fabrics to diffuse the sunlight, creating a soft glow that highlights the food without overpowering it. Natural light adds a subtle warmth that complements dark tones.
Artificial Lighting:
Artificial light sources, like softboxes or LED lights, are often more controlled and predictable than natural light. You can manipulate the intensity and direction of the light more easily. When using artificial light, it’s best to use a low-intensity light source to avoid harsh reflections and maintain the soft and moody feel.
Creating Soft Directional Light:
The key to dark and moody photography is the play between light and shadow. Soft directional light helps emphasize the textures and details of the food while casting soft shadows that create depth. Positioning your light source at a 45-degree angle to the subject or slightly above can help define shapes and enhance the drama.
Importance of a Light Diffuser or Reflector:
Using a light diffuser helps soften the light, preventing harsh highlights and creating a more even spread of light across your subject. A reflector can bounce the light back onto the food, filling in shadows without eliminating them. This balance is crucial to maintaining the moody and atmospheric quality of the image.
Essential Equipment for Dark and Moody Photography

In dark and moody food photography, the equipment you use plays an important role in achieving the desired effect. Here are the essentials you’ll need to set up your studio:
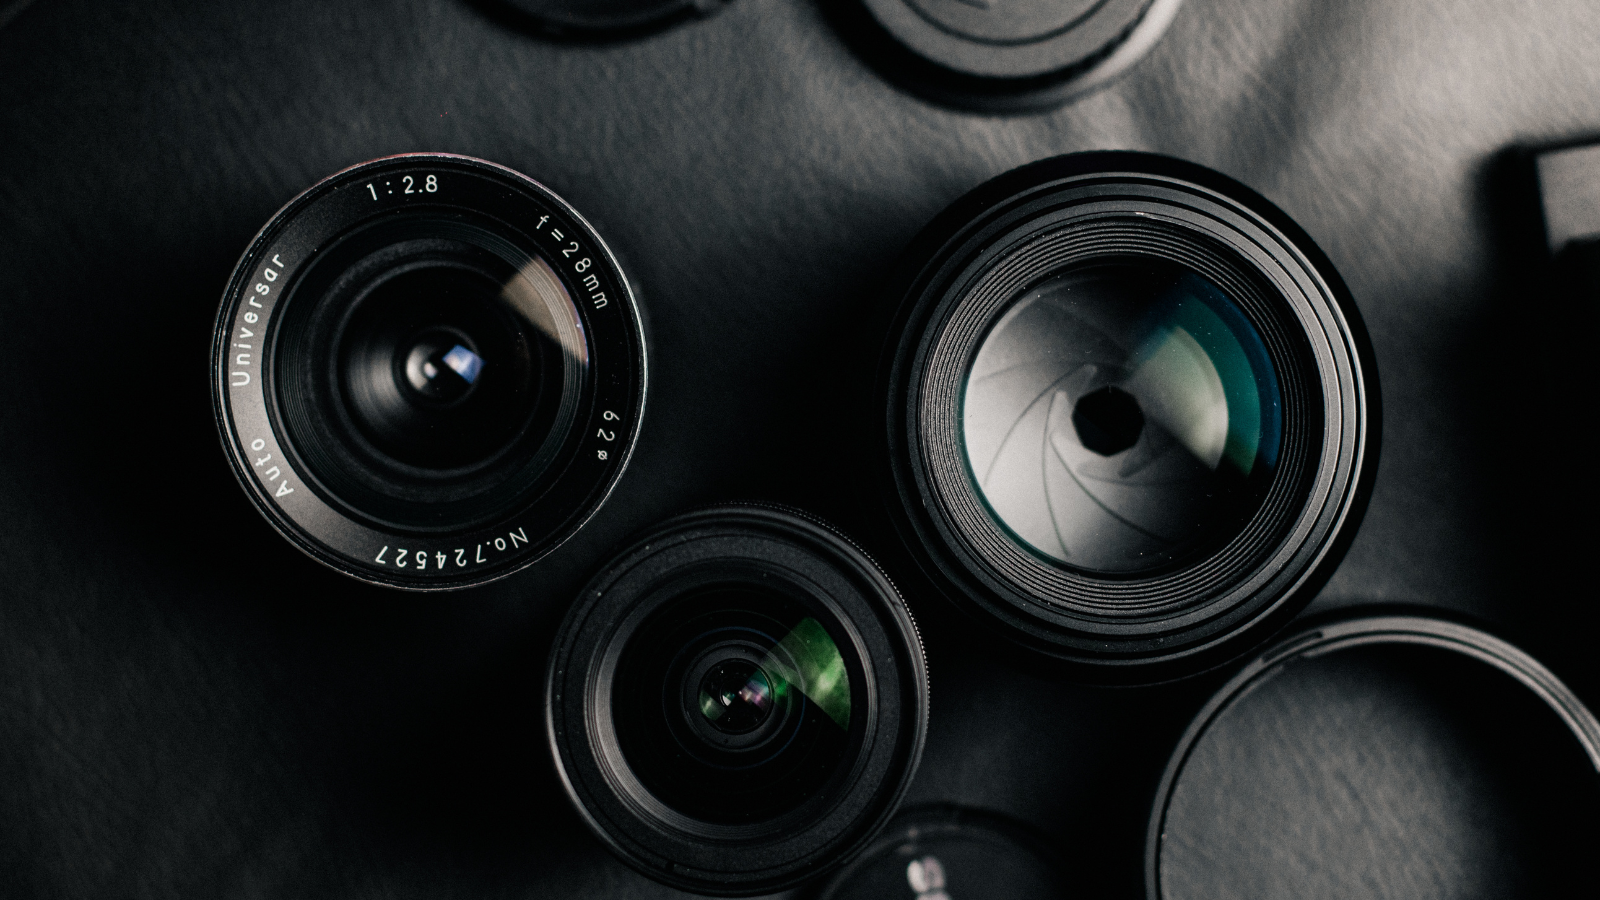
Camera Settings and Lenses:
For optimal results, understanding the right camera settings for product photography is essential to ensure your images capture the desired details, lighting, and mood.
Aperture:
To create a shallow depth of field and keep the background softly blurred, use a wide aperture (e.g., f/2.8 or f/4). This allows you to focus on the food while leaving everything else in soft shadow.
ISO:
Keep the ISO low (e.g., 100 or 200) to avoid graininess, as this style relies on clarity in the textures and fine details of the food. However, in low-light environments, you may need to increase the ISO slightly for proper exposure.
Shutter Speed:
A slower shutter speed (e.g., 1/60s) allows for better control over the exposure and lighting. If you're using artificial light, ensure that the shutter speed is synchronized with the light source to avoid any motion blur.
Tripods and Stabilizers for Sharp Shots:
When working with low light, using a tripod is essential to avoid any camera shake. It ensures your shots remain sharp and even with slower shutter speeds. If you're shooting in a tight space or from unusual angles, a camera stabilizer can help maintain steady shots, especially for overhead or close-up photography.
Light Modifiers and Backgrounds:
Light modifiers, such as softboxes or barn doors, control the spread and direction of the light. Use these to sculpt the light exactly the way you want it. For backgrounds, choose dark, textured surfaces like wood, stone, or charcoal-colored fabrics to create a dramatic contrast with the food. These textures help anchor the food within the frame and add to the overall moodiness of the shot.
Creating the Right Environment
The environment you create in your studio is just as important as the lighting and equipment. The backdrop, props, and textures all work together to complement the food and help set the mood.
Ideal Backdrop Colors and Textures:
For dark and moody food photography, the backdrop should be minimal but impactful. Choose deep, neutral tones like dark browns, blacks, and grays to allow the food to stand out. Wood, stone, or metal surfaces provide natural textures that create depth and interest in the image.
These materials also enhance the rustic, authentic feel that is often present in dark and moody photography. For more insights on selecting the perfect backdrop, check out this comprehensive guide on product photography backdrops.
Choosing the Right Props to Enhance the Mood:
Props should enhance, not overwhelm, the food. Vintage cutlery, dark ceramic plates, and textured linens work beautifully to evoke a timeless and intimate atmosphere. Use props sparingly, allowing the food to remain the focal point, but include items that complement the mood you’re trying to create. For example, a dark wine glass or a rustic wooden spoon can add just the right amount of character to the composition.
Mastering Composition and Framing
Once your lighting and studio setup are ready, it’s time to focus on composition. Dark and moody photography thrives on fine detail. Instead of capturing an entire spread, highlight specific elements like the gloss of a sauce, the crumb of bread, or the texture of a fruit's skin. These details bring intimacy and richness to your image and help create a sense of realism that resonates with viewers.
Also, depth adds dimension and helps the viewer connect with the scene. Rather than presenting food in a flat setup, create a sense of space through layering. This can be done using foreground and background elements like utensils, herbs, folded linens, or complementary dishes.
Negative space is equally important. In dark and moody photography, large areas of darkness or blur help isolate your subject. These open spaces allow the food to breathe and prevent the frame from feeling cluttered. Use negative space to build tension, lead the eye, or simply let the image feel more refined.
Lastly, we will be discussing shadows. The way shadows fall across your scene can create mystery, highlight texture, and define structure. Side lighting or backlighting is typically the most effective for creating dramatic shadows.
Side light sculpts the edges of your subject and adds dimension, while backlight can create beautiful highlights and separation from the background. Experiment with the angle of your light to see how it changes the feel of the image.
You can also shape shadows using flags or black cards to block light in targeted areas. This allows you to control how much of the scene is visible and how much falls into obscurity. A strong shadow behind a spoon or the subtle falloff behind a textured backdrop can elevate a simple photo into a cinematic shot.
Editing Your Dark and Moody Food Photos
Editing brings polish to your visual story. The mood is created in-camera, but post-processing refines the depth, tone, and emotion. A thoughtful editing workflow can turn a good photo into a striking, professional image.
Post-Processing Basics
Start with contrast, brightness, and shadows. Boost contrast slightly to enhance drama. Keep brightness low, just enough to illuminate the subject. Deepen shadows without losing important textures.
Color work is essential. Muted tones help maintain the moody atmosphere, but subtle pops of warmth or coolness can add complexity. Choose a color direction that supports your overall visual identity.
For soft grounded edits with organic tones, you might explore options like the Natural Editing Pack, which is designed to preserve texture and tone without overpowering the image.
Advanced Editing Techniques
Use selective editing to draw focus. Lighten a single sauce drip or sharpen the edge of a crust to guide the eye. Add subtle grain or noise for a raw, tactile finish. For a more artistic or surreal twist, tools like the Fantasy Editing Pack can introduce deeper shadows, color shifts, and a slightly cinematic feel while keeping the food natural.
Final Touches
Maintain consistency across your images. Custom presets or editing packs save time and help unify tones and light levels. Review your full set and ensure your edits support the story you want to tell.
Endnote
Dark and moody food photography is an invitation to feel something deeper through texture, light, and storytelling. From selecting the right ingredients to styling with intention and editing with care, every step helps shape an image that speaks.
The key is to keep practicing. Test new lighting angles, adjust your framing, and explore editing styles that match your creative vision. With time, your work will begin to carry its own signature mood and voice.
For broader inspiration on styling, composition, and professional setups, browse the studio product photography portfolio. It showcases a range of approaches that can help you sharpen your eye and expand your creative direction.