
50 Common Product Photography Questions: Expert Answers & Tips
In today’s digital world, high-quality product photography is crucial for e-commerce, branding, and social media success. Clear and well-lit images help your products stand out, build trust with potential customers, and boost sales. Your photos are often the first impression of your brand whether you're running an online store or promoting products on Instagram,
This guide answers the 50 most common questions about product photography, providing practical tips for photographers of all levels. Whether you're a beginner looking to get started or a pro fine-tuning your skills, you'll find valuable insights to improve your shots.

Section 1: Getting Started in Product Photography
1. What is Product Photography?
Product photography is the art of capturing high-quality images of products to showcase their features and appeal. These images are used by businesses to promote and sell their products, whether on e-commerce websites, social media, or marketing materials.
High-quality product photos are essential for attracting customers, building trust, and enhancing brand identity. Effective product photography communicates the look, feel, and value of the product, often influencing a buyer’s decision.
2. How Do I Get Started with Product Photography?
Starting in product photography can seem intimidating, but breaking it down into manageable steps makes the process more approachable. Begin by focusing on a few essentials:
Essential Equipment: A basic camera, a tripod for stability, and a lighting kit to ensure proper exposure are the minimum gear you need.
Lighting: Natural light can be great for beginners, but investing in artificial lighting (softboxes or LED lights) will give you more control over shadows and highlights.
Space: Set up in a clutter-free area with a simple backdrop, like a white or neutral-colored surface, to help your product stand out. If you're looking for more options for backdrops, check out guide to product photography backdrops for helpful tips on selecting the right backdrop for your shots.
Start simple, and as you grow, add more specialized tools to your kit.
3. Do I Need Professional Gear to Start Photographing Products?
You don’t need to start with professional gear to get great results. In fact, many successful product photographers began with basic cameras, even you can use an iphone for product photography, and lighting setups. The key is learning how to use what you have effectively.
☑️ Pros of Beginner Gear: Budget-friendly, accessible, and portable.
❌ Cons of Beginner Gear: Limited features, less control over settings, and may struggle with low-light situations. As you improve, upgrading your gear can enhance image quality and offer more creative control, but you can start producing quality product photos with basic equipment.
4. What is the Best Camera for Product Photography?
Choosing the right camera depends on your budget, experience level, and how much control you want over your settings. If you’re unsure where to start, our Best Camera for Product Photography Guide breaks down top camera options for every level.
Here are a few recommendations:
Beginner: A DSLR or mirrorless camera with a basic kit lens (like the Canon EOS Rebel T7 or Sony Alpha A6100) can capture high-quality product shots in an economical way.
Intermediate: For more control over settings, try a camera like the Sony Alpha 7 IV or Nikon Z 5. These offer more customization for lighting, exposure, and focus.
Advanced: Professional cameras like the Canon EOS R6 Mark II or Sony a7 offer the highest resolution and customizable settings to fine-tune your shots.
Regardless of what gear you choose, learning how to use it well is more important than owning the most expensive equipment.
5. How Much Should I Charge for Product Photography?
Pricing can vary greatly based on experience, location, and the complexity of the shoot. Here’s a general guideline:
Beginners: $50-$150 per hour for simple product shots.
Intermediate/Experienced: $150-$500 per hour, depending on the client's needs, such as the number of products or special requests (e.g., lifestyle shots, studio setups photography).
Advanced: $500 and up, especially for high-end products, large-scale commercial shoots, or ongoing projects.
It’s important to consider your time, equipment, editing process, and client expectations when setting your rates. If you want a real-world look at how rates can vary, this breakdown of My Highest Paid Shoot vs. My Lowest Paid Shoot offers valuable insights into pricing strategy and client types.
Offering packages or project-based pricing can also help streamline your workflow and give clients a clearer idea of what to expect.
6. What Are the Essential Tools and Equipment for Product Photography?
While you can start with the basics, there are key tools that will improve your results:
Camera: A DSLR or mirrorless camera with manual settings.
Lenses: A 50mm lens or macro lens works well for most product shots. A macro lens is ideal for close-up product details.
Tripod: Ensures stability and prevents shaky images, especially in low-light situations.
Lighting: Softboxes, LED panels, or ring lights to create consistent lighting and reduce harsh shadows.
Backdrop: Simple backgrounds like white, black, or neutral colors to keep the focus on the product.
Reflectors and Diffusers: To soften harsh light or bounce light back onto the product.
7. How Can I Improve My Product Photography Skills Quickly?
Improving your product photography skills takes time, but here are a few tips to speed up your progress:
Practice Regularly: Take photos every day, experimenting with different products, lighting setups, and compositions. The more you practice, the faster you'll learn.
Learn Lighting Techniques: Lighting is the most important aspect of product photography. Learn how to use soft and hard light, bounce light, and manipulate shadows for different effects. Mastering lighting techniques will give you much more control over the final look of your photos.
Study Composition and Color Use: Strong composition and thoughtful color choices can make your images stand out. Applying color psychology can influence how a viewer emotionally responds to your product, enhancing its appeal.
Master Editing: Post-processing is just as important as shooting. Learn to use software like Adobe Photoshop or Lightroom to adjust exposure, contrast, and sharpness, and remove backgrounds when necessary.
By combining practice with a solid understanding of lighting and editing, you’ll see rapid improvement in your product photos.
Section 2: Understanding Lighting in Product Photography
Lighting is one of the most critical elements in product photography. The right lighting setup can transform a simple shot into a captivating one, while poor lighting can make even the best product look dull. Understanding how to control light is key to producing consistent and professional results.
8. What’s the Best Lighting for Product Photography?
There are two primary types of lighting used in product photography: natural light and artificial light.
Natural light is free and often produces a soft and flattering look, but it's also unpredictable. It’s great for small shoots or when working near windows, but it’s not always reliable for consistency. Here is our article to optimize the use of natural light.
Artificial light, such as studio lights or continuous LED lighting, gives you full control over intensity and direction, ensuring more consistency, especially in a controlled environment. LED panels, softboxes, or ring lights are popular choices for artificial lighting in product photography.
Choosing between natural and artificial lighting depends on your environment, desired effect, and the amount of control you need over your setup. For reliable and studio-quality results, artificial lighting is often the better choice.
9. How Do I Create Soft Lighting for Products?
Soft lighting is often preferred in product photography because it reduces harsh shadows and highlights, providing even and flattering light for the product. Here's how to achieve it:
Diffusers: A diffuser softens the light from your source, spreading it evenly across the product. You can use professional diffusers or DIY options like a white bed sheet or a sheer curtain.
Softboxes: These are popular tools for creating soft light. Softboxes are larger light modifiers that help to diffuse the light over a broader area, giving a soft and flattering effect.
Bouncing Light: Another technique is to bounce light off a reflective surface, like a white wall or reflector, to soften the effect and reduce harsh shadows.
The key to soft lighting is to increase the size of the light source relative to the product. The larger the light source, the softer and more flattering the light will be.
10. What is a Lightbox, and Should I Use It?
A lightbox is a small and enclosed box designed to diffuse light evenly around the product. It's ideal for photographing small items like jewelry, watches, or electronics.
A lightbox provides controlled lighting, reducing shadows and hotspots, and allows you to focus on the product without worrying about lighting placement. It’s particularly useful when shooting small or reflective products.
For larger items or when more creative lighting control is needed, a lightbox might not be ideal, but it’s a great tool for quick and high-quality shots of smaller items.
11. How Do I Deal with Shadows in Product Photography?
Shadows are a natural result of lighting but can be either an asset or a hindrance in product photography. Here’s how to manage them:
Minimizing Shadows: Use diffusers, softboxes, or bounce light to reduce harsh shadows on the product. Proper light placement is key—placing your light source higher or further away from the product can soften the shadows.
Using Shadows Creatively: In some cases, shadows can add depth, drama, and interest to a shot. For example, side lighting creates defined shadows that can emphasize texture and shape. If the shadow is part of your creative vision, control its intensity by adjusting the light’s distance from the product.
Experiment with different lighting angles and tools to either eliminate or enhance shadows based on the look you're going for.
12. Can I Use Natural Light for Product Photography?
Yes, natural light can work beautifully for product photography, but it has its pros and cons:
When It’s Effective: Natural light is perfect for soft and organic-looking product shots, especially if you're shooting near windows or in well-lit areas. It's ideal for smaller products or when you want to create an airy and natural feel.
When Studio Lighting is Better: Inconsistent lighting, such as during cloudy days or at night, can lead to uneven exposures and difficult shooting conditions. In these cases, artificial studio lighting is more reliable, especially for products that require precise lighting or if you need to shoot at certain times of the day.
For best results, use natural light in the morning or late afternoon when it’s softer, or supplement it with artificial lighting to control consistency. After capturing your shots with natural light, you can enhance the final result by using a dedicated editing pack designed for natural lighting, like our Natural Editing Pack, to ensure your photos maintain their organic and soft look.
13. How Do I Create Reflective Lighting for Glass or Metal Products?
Photographing reflective surfaces like glass or metal presents unique challenges. To avoid unwanted reflections and create flattering images:
Use Soft and Diffused Light: Soft lighting helps reduce glare and harsh reflections, making the surface appear smooth and even.
Control the Angle: Angle the light source at a 45-degree angle from the product to avoid direct reflections while still illuminating the product.
Polarizing Filter: A polarizer can help reduce reflections, particularly on shiny surfaces like glass and water. It’s a useful tool for photographers working with highly reflective products.
Adjust the Background: Use neutral or dark backgrounds to minimize reflection distractions.
If you're aiming for a more dramatic or stylized look when photographing reflective surfaces, you can experiment with creative editing, such as using our Fantasy Editing Pack to add a unique flair to your images.
14. How Can I Use Reflectors in Product Photography?
Reflectors are a great way to control light without adding additional light sources. They bounce light back onto the product, creating more even lighting and filling in shadows.
Positioning Reflectors: Place the reflector opposite the light source to bounce light onto the darker areas of the product. Reflectors can soften shadows and bring more balance to the overall lighting.
Types of Reflectors: Reflectors come in different colors (white, silver, gold) to provide different lighting effects. A white reflector creates a soft, natural fill light, while a gold reflector adds warmth to the image, and a silver reflector boosts the light, providing higher contrast.
Using reflectors is a quick and cost-effective way to improve your lighting and achieve a professional look.
Section 3: Composition and Styling for Product Photography
Composition and styling are just as important as lighting when it comes to product photography.
A well-composed image ensures the product stands out and communicates its value effectively. This section will guide you through the key concepts of composition, angles, and styling tips to create impactful product shots.
15. How Do I Compose a Product Photo?
Composition is the arrangement of elements within the frame. A strong composition directs the viewer’s attention to the product and creates visual interest. Here are a few tips to help you compose a compelling product shot:
The Rule of Thirds: Imagine your frame divided into a grid of nine equal parts (two vertical and two horizontal lines). Place the product along these lines or at their intersections to create a balanced and pleasing composition.
Leading Lines: Use lines in your scene (like the edges of a table or background elements) to draw the viewer’s eye toward the product.
Negative Space: Don’t be afraid to leave some empty space around the product. This gives the subject room to breathe and makes it stand out more.
Symmetry and Balance: If you're aiming for symmetry, ensure both sides of the image are balanced. This can create a more aesthetically pleasing shot, particularly for minimalistic product shots.
Good composition ensures that the product remains the focus of the shot while creating a visually engaging image.
16. Should I Shoot Product Photos Straight On or at an Angle?
The angle at which you shoot a product can dramatically affect how it is perceived. Here’s when to use each angle:
Straight-On: Shooting directly in front of a product is great for flat products like books, tech devices, or small items like jewelry. It gives a clean, symmetrical look that showcases the product without distractions.
At an Angle: For products with more depth (like bottles, boxes, or shoes), shooting from an angle can highlight texture and shape. Angles also give the product more dimension and make the shot feel more dynamic.
When deciding on the angle, think about what features of the product you want to emphasize and the overall mood you want to convey.
17. What is a Hero Shot, and How Do I Create One?
A hero shot is a product’s main shot—the one that represents the item in its best light and is often used for marketing materials or e-commerce listings. Here’s how to create one:
Clean and Focused: Make sure your hero shot is clean and free of distractions. The product should be the sole focus of the image, with minimal background clutter.
Lighting: Use soft and even lighting to highlight the product’s best features without harsh shadows or overexposure.
Composition: Center the product in the frame for maximum emphasis. Use the rule of thirds for added balance, or try creative angles if the product has interesting features that need to be showcased.
A hero shot should be simple, direct, and convey everything that’s great about the product. If you're looking to understand how product photography directly impacts your e-commerce success, be sure to check out The Role of Product Photography in E-Commerce Business Success.
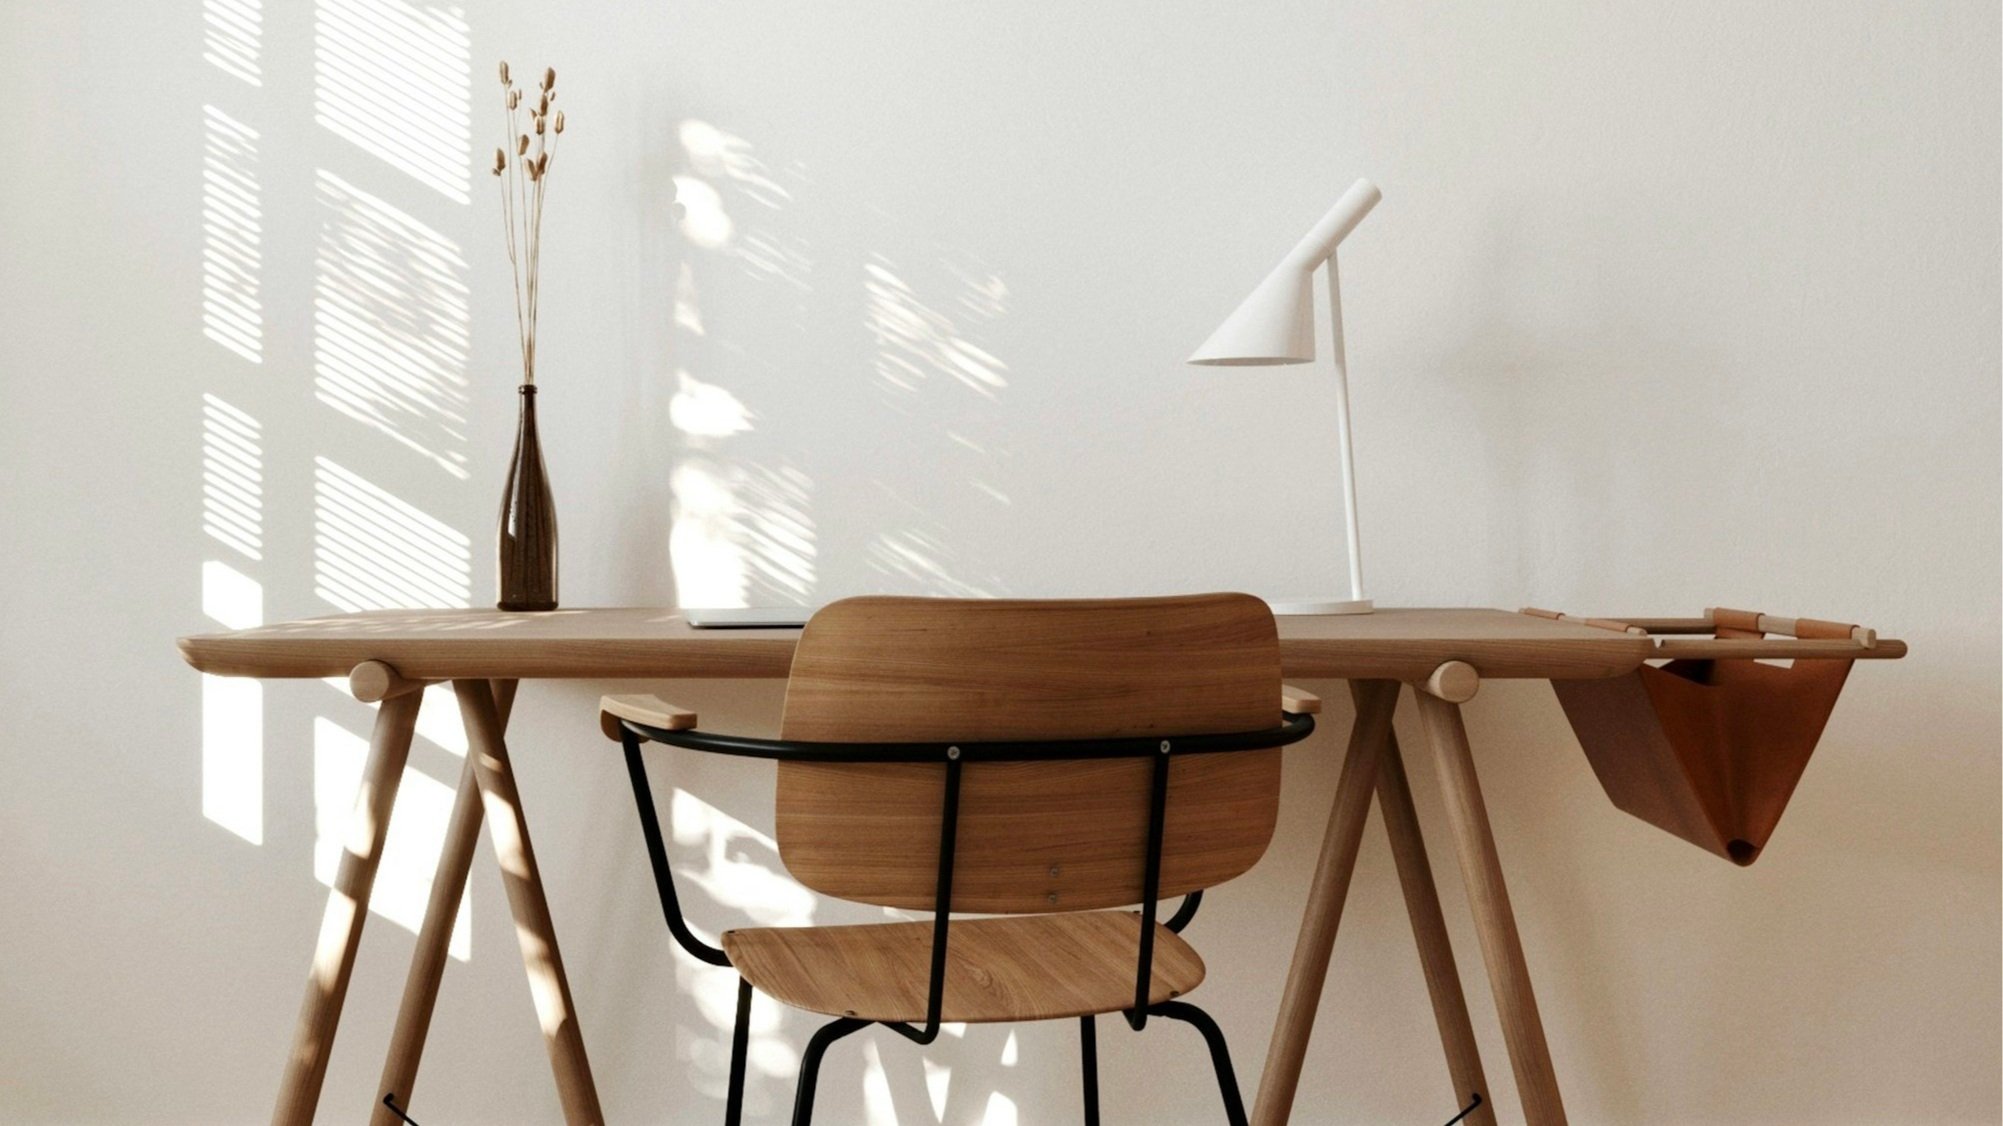
18. How Do I Create a Minimalist Look in Product Photography?
Minimalist product photography focuses on simplicity, clean lines, and uncluttered space. Here are some styling tips to achieve a minimalist look:
Use Neutral Backdrops: Stick with white, black, or neutral-colored backgrounds to ensure the product stands out. Here is our guide to product photography backdrops.
Limit Props: Use very few props or elements. A single item, like a plant or piece of fabric, can add interest without overwhelming the shot.
Clean and Simple Composition: Leave plenty of negative space around the product. Minimalism is all about creating an open, airy feel in your images.
Focus on the Product: Ensure that the product is the central focus. Keep the styling and composition simple, allowing the product’s details to shine.
Minimalist photography is timeless and often leads to high-impact and elegant images.
19. What Props Should I Use in Product Photography?
Props can add context, creativity, and a sense of lifestyle to product shots. However, it’s important to use props thoughtfully. Here’s how to incorporate them effectively:
Relevance: Use props that relate to the product and its use. For example, a coffee mug could be styled with a plate, spoon, or book to evoke a cozy vibe.
Subtlety: Don’t let props steal the show. They should complement the product, not distract from it. Use them sparingly to maintain focus on the product itself.
Mood Setting: Props can help set the mood or story behind a product. For example, a candle might be paired with greenery or soft lighting to create a calming, lifestyle-focused image.
Props are excellent for creating visual storytelling, but remember, less is often more.
20. How Do I Shoot Products with Texture or Intricate Details?
Products with intricate textures or fine details, such as fabrics, jewelry, or artwork, require special attention:
Use Macro Lenses: A macro lens allows you to get extremely close to the product, highlighting details like stitching, patterns, or textures that would be difficult to capture with a standard lens.
Lighting: Be mindful of the lighting. Direct lighting can help highlight texture, while diffused lighting softens the shadows and makes details pop without harsh contrast.
Focus on the Details: Don’t be afraid to focus on one small detail to create a more intimate shot. For example, photographing a close-up of the texture on a fabric or a close-up of a watch’s engravings can create an impactful image.
Depth of Field: Use a shallow depth of field (wide aperture) to blur the background, keeping the focus on the product’s textures or intricate details.
21. How Do I Create a Lifestyle Product Shot?
A lifestyle product shot showcases the product in a real-world context, helping potential customers envision how they will use it. Here’s how to style a lifestyle shot:
Incorporate People or Setting: Including people or the product in its intended environment (e.g., a clothing item worn by a model or a kitchen appliance in use) adds context and life to the image.
Create a Story: Think about the story you want to tell. For example, a fitness product could be photographed outdoors, conveying an active lifestyle.
Use Props to Enhance the Scene: Props like plants, furniture, or textured fabrics can help create the environment but should remain subtle enough not to overpower the product.
Lighting: Natural light often works best for lifestyle shots as it conveys warmth and authenticity. Ensure the product is well-lit and blends seamlessly into the environment.
Lifestyle shots help make a product relatable and can elevate a brand’s message.
Section 4: Editing Product Photos
Editing is an essential part of the product photography process. While shooting the product with proper lighting and composition is important, post-processing allows you to fine-tune your images, fix imperfections, and make sure your product looks its absolute best. In this section, we’ll cover some of the key techniques and tools that can help you edit product photos effectively.
22. What Software Should I Use for Product Photography Editing?
When it comes to editing product photos, there are several software options available, depending on your skill level and editing needs. Here are a few recommendations:
For Beginners:
Adobe Lightroom: A user-friendly tool that offers powerful color correction, exposure adjustments, and basic editing tools. Lightroom is great for batch editing, especially when working with multiple images.
Canva: A simple online tool for quick edits, background removal, and adding text or graphics to images. Canva is more of a design tool but offers some great editing features for beginners.
For Intermediate to Advanced Users:
Adobe Photoshop: A professional editing software that allows for advanced photo manipulation, layer-based editing, retouching, and intricate adjustments. Photoshop is best for those looking for complete control over their edits.
Capture One: A high-quality image editor favored by professional photographers for its color grading and tethering capabilities. It’s a powerful alternative to Lightroom, especially for those who shoot in RAW.
Each of these tools offers a range of functionalities that can help you elevate your product photography. It’s important to choose the software that matches your needs and level of expertise. You can also explore the best programs for running a photography business that mentions some of the management tools also.
23. How Do I Remove a Background from a Product Photo?
Removing backgrounds from product photos is a common editing task, especially for e-commerce sites that require clean and white backgrounds for consistency and a professional look. Here's how to do it:
Using Photoshop:
Quick Selection Tool: Use the Quick Selection tool to select the product, then refine the edges using the Refine Edge tool. Once the product is selected, you can simply delete the background or replace it with a white or transparent background.
Pen Tool: For more precise and detailed cutouts, use the Pen tool to manually trace around the product. This gives you full control over the selection, especially for complicated edges.
Using Lightroom:
While Lightroom doesn’t directly support background removal, you can make use of the brush tool to adjust exposure and create a “pseudo-background removal” by making the background lighter or darker to match a white background.
Online Tools:
Websites like remove.bg offer simple and automated solutions for background removal. Upload your image, and it will quickly detect and remove the background, leaving you with a clean image ready for further editing.
24. How Do I Color Correct Product Photos?
Color correction is crucial for ensuring your product images reflect the actual colors of the items being sold. Here are some steps to follow:
Use White Balance: In Lightroom or Photoshop, adjust the white balance to ensure the colors in your photo appear natural. This is particularly important when working with artificial light sources that may introduce color casts.
Adjust Temperature and Tint: In Lightroom, use the temperature and tint sliders to fine-tune the warmth (cool or warm tones) of your image. Correcting these settings can help match the actual product color more accurately.
Use HSL/Color Panels: Both Lightroom and Photoshop have HSL (Hue, Saturation, and Luminance) panels that allow you to adjust specific colors in your image without affecting others. Use these tools to fine-tune reds, greens, blues, and other hues to match the true color of the product.
Monitor Calibration: If you find color discrepancies between your edits and the final print or screen display, calibrating your monitor can ensure you’re seeing accurate colors.
Effective color correction helps maintain consistency across your product images, making sure customers receive a realistic view of your products.
25. How Do I Deal with Reflections or Glare in Product Photography?
Reflections and glare can be challenging when photographing reflective surfaces like glass, water, or shiny packaging. Here are a few solutions to consider:
Adjust the Light Source: When shooting reflective products, angle your light sources at a 45-degree angle to avoid creating harsh reflections. This allows the product to be lit evenly while minimizing unwanted reflections.
Use Polarizing Filters: A polarizing filter helps reduce reflections, especially on shiny surfaces like glass or metal. It allows you to capture the details of the product without dealing with distracting glare.
Photoshop Retouching: If reflections are unavoidable, you can remove or minimize them using Photoshop. The Clone Stamp Tool or Healing Brush allows you to cover unwanted glare areas with pixels that match the surrounding area.
Soft Lighting: Diffused lighting (such as softboxes or diffusers) reduces the intensity of reflections and creates a more even illumination on the product, minimizing glare.
Dealing with reflections requires both thoughtful shooting techniques and post-processing skills to ensure the product looks its best.
26. How Do I Sharpen Product Images for Clarity?
Sharp and clear images are key to showing off product details. Here's how to enhance the sharpness of your photos:
Use Lightroom’s Clarity and Texture:
In Lightroom, use the Clarity slider to add midtone contrast, which enhances sharpness. The Texture slider is excellent for increasing the clarity of finer details, such as fabrics or intricate product features.
Sharpening in Photoshop:
In Photoshop, use the Unsharp Mask or Smart Sharpen filter to enhance sharpness. Start with a low radius and high amount to avoid introducing noise or halos around the product.
Check the Resolution:
Ensure your images are high resolution to maintain clarity when zooming in on product details. Lower resolution images may appear blurry or pixelated when viewed on large screens.
Focus Stacking:
For products with multiple focal points (like jewelry or textured surfaces), use focus stacking to combine multiple images taken at different focus points into one sharp photo.
Sharpness enhances the visual impact of your product and makes it easier for customers to examine the details.
27. How Do I Resize Product Photos for E-Commerce Sites?
Resizing product photos is crucial for web performance. Too large a file can slow down page load times, while too small a file may not provide adequate detail. Here's what to consider:
Image Dimensions: Standard e-commerce sites typically recommend product images between 1000px and 2500px on the longest side for optimal display. This size ensures high-quality images without slowing down the website.
File Size: Keep the file size under 200 KB to ensure quick page loading. Use tools like JPEGmini or ImageOptim to compress images without compromising quality.
Aspect Ratio: Maintain a consistent aspect ratio for your product images across your site. Most e-commerce platforms prefer square images (1:1 ratio), but others may require portrait or landscape orientations depending on the design.
Use Web-Friendly Formats: Save images in JPEG format for high-quality results with smaller file sizes. PNG is better for images with transparency, but its file size can be larger.
Resizing your images according to these best practices ensures they are both high-quality and web-optimized, improving user experience and site performance. For more detailed guidance on optimizing product images for SEO and ensuring your images are search-friendly, check out our article on Optimizing Product Images for SEO.
Section 5: Specialized Product Photography
Specialized product photography requires unique techniques to ensure that specific product types are showcased in their best light. In this section, we’ll dive into some of the most common types of product photography and how to shoot them effectively.
28. How Do I Photograph Jewelry and Small Items?
Shooting jewelry and other small products requires attention to detail and proper lighting to highlight their intricate features. Here are some tips to achieve stunning shots:
Use Macro Lenses: A macro lens allows you to capture tiny details such as engravings, textures, and the sparkle of gemstones with clarity and precision.
Lighting: For small items, especially jewelry, soft and diffused lighting is ideal to avoid harsh reflections. Use a lightbox or a softbox to create even and shadow-free lighting.
Background: Keep the background simple to avoid distraction. A white or neutral-colored background works best for jewelry, allowing the product to stand out. You can also use textured backgrounds like velvet or wood to add interest while keeping the focus on the product.
Stabilize Your Camera: Use a tripod to prevent camera shake, which can result in blurry images.
29. How Do I Photograph Food for Product Shots?
Food photography is about making the food look appetizing and fresh. Here’s how to get perfect food shots:
Lighting: Natural light is often the best option for food photography. Soft and diffused natural light enhances the texture and colors of food without causing harsh shadows or overexposure. If you're working indoors, try to use a large window or diffuse your light with sheer curtains.
Styling: Food styling is key to making the product look appetizing. Use props like plates, napkins, or utensils that complement the food but don’t overshadow it. Consider using fresh ingredients or condiments to enhance the visual appeal. Here is how we styled a fruit photoshoot for making them look juicy.
Composition: Use the rule of thirds and experiment with different angles. Overhead shots work well for dishes like pizza, bowls, or platters, while side angles are great for drinks or sandwiches to show their layers.
Colors: Ensure the food’s natural colors are vibrant. Color balance is important to maintain a fresh look, especially when photographing fruits, vegetables, or beverages.
30. How Can I Photograph Reflective Products Like Watches and Glassware?
Reflective products like watches, glassware, and other shiny objects present unique challenges due to reflections and glare. Here are some specialized techniques:
Use Polarizing Filters: A polarizing filter helps reduce unwanted reflections on reflective surfaces, ensuring that details such as engravings, labels, or textures are clearly visible.
Soft Lighting: To minimize harsh reflections, use soft, diffused lighting. A softbox or a diffuser can help create an even light across the product without creating hotspots or reflections.
Adjust Your Angle: The angle at which you shoot can drastically affect reflections. Shooting from a slight angle helps minimize glare while allowing the product’s details to show through.
Backdrop: Use a simple background that won’t compete with the product’s reflective surface. A dark background often works best to highlight shiny products like glass or metal.
31. What’s the Best Way to Photograph Clothing and Apparel?
Fashion photography for clothing and apparel is about capturing the product in a way that showcases its fit, texture, and overall appeal. Here are a few tips:
Model or Mannequin: For clothing, consider using a model or mannequin to show how the item fits. Ensure the clothing is properly styled and adjusted to avoid wrinkles or distractions.
Lighting: Soft and even lighting is ideal to showcase fabric textures without harsh shadows. Consider using multiple light sources to illuminate the product from all angles, especially when shooting a model wearing the clothing.
Angles: Straight-on shots work well for tops, dresses, or jackets, while side angles are great for showcasing the fit of pants or skirts. Focus on key details like buttons, zippers, or stitching when close-up shots are required.
Background: Use simple backgrounds to keep the focus on the clothing. If you’re going for an editorial-style shoot, try adding props like hats, shoes, or bags that complement the outfit.
32. How Do I Photograph Tech Products or Electronics?
Tech products and electronics often have reflective surfaces, which means extra care must be taken to avoid glare and showcase their features clearly. Here’s how to photograph electronics:
Lighting: Use diffused light to reduce glare from screens or glossy surfaces. Consider using softboxes or LED panels for even and controlled lighting.
Avoid Glare: Position the light source carefully to avoid reflections on screens or shiny surfaces. A polarizing filter can also help minimize unwanted reflections on glossy surfaces.
Background: Keep the background simple, preferably neutral-colored to avoid distractions. If you want to highlight the product’s features, consider a backdrop that complements the product, such as minimalistic furniture or sleek surfaces.
Angles: Shoot from multiple angles to showcase the tech product’s design and functionality. For electronics, focus on close-up shots that highlight buttons, ports, and other features.
33. How Do I Photograph Products in Motion or with Action Shots?
Capturing products in motion or action shots can add a dynamic element to your photography. Here’s how to do it effectively:
Shutter Speed: Use a fast shutter speed to freeze the motion, or a slower shutter speed to capture motion blur for a more dynamic effect. A tripod is essential for slow shutter speeds to avoid camera shake.
Lighting: For action shots, ensure you have bright, even lighting to properly expose the product in motion. Continuous lighting works well for this, allowing you to capture motion without worrying about light changes between shots.
Backdrop: Use a simple and uncluttered background to ensure the product is the focus. If you're photographing action, like a product in use, consider using a setting that helps tell the story—like a basketball in motion on a court or a coffee machine brewing in a kitchen.
Stabilization: If you’re shooting small products in action, such as a running watch or a moving toy, use a tripod or gimbal to keep the camera steady and capture crisp and clear motion shots.
34. How Do I Photograph Skincare Products?
Photographing skincare products presents its own set of challenges, as they are often contained in small bottles or jars with glossy or reflective surfaces. Here’s how to capture them beautifully:
Use Soft & Diffused Lighting: Soft and natural light or diffused artificial lighting is key to showing the texture and packaging details without creating harsh reflections. This is especially important for products in transparent bottles or containers.
Angle the Light: To highlight the smoothness and design of the product’s packaging, angle the light at 45 degrees. This will reduce reflections and allow the product’s label and texture to stand out.
Close-Up Shots: Skincare products often have intricate labels or small design elements. Close-up shots are ideal to showcase these details. Make sure the lens is focused on the logo or key design aspects.
Props: Consider incorporating complementary props, such as towels, small plants, or elegant glassware, to help set the mood and context for the skincare products. Avoid overcrowding the frame, keep the focus on the product. Here you can explore more skincare product photo ideas.
35. How Can I Photograph Outdoor Lifestyle Products?
For products tied to outdoor adventure and lifestyle, it’s important to incorporate the environment into your photos. Here are some tips for shooting these types of products:
Setting the Scene: For products like whiskey, consider shooting in outdoor settings, such as a camping scene or a rustic bar setup. Incorporate elements like wood, fire, or natural landscapes to enhance the product's connection to adventure.
Lighting: Use natural light for outdoor lifestyle shots to create a warm, authentic atmosphere. Golden hour (just before sunset) is perfect for outdoor product shots, as it casts a beautiful, warm glow over the scene.
Composition: Focus on telling a story with your images. For whiskey or similar products, showing the bottle being poured into a glass or placed next to a campfire adds context and makes the product feel more relatable.
Props and Details: Include props like whiskey glasses, outdoor tools, or even clothing that fits the adventure theme. Just be sure not to overcrowd the image. Keep the focus on the product while creating a visually interesting scene.
Check out our guide to lifestyle product photography for an in-depth look at how to shoot lifestyle images that captivate your audience.
Section 6: Photography Business Management FAQs
Managing a photography business involves balancing creative work with operational tasks. Below are some of the most frequently asked questions related to the business side of photography:
36. How Do I Handle Client Expectations?
Managing client expectations is key to building strong relationships. Set clear expectations from the beginning by discussing timelines, deliverables, and payment schedules. Be transparent about what’s achievable, and keep communication open throughout the process to ensure both you and the client are aligned.
One of the best ways to streamline this is by using a Welcome Packet, which provides all the essential information in one polished and branded document. A tool like the Client Welcome Packet Template is designed to guide your clients through your workflow with ease. It covers everything from your booking process to shipping instructions and shooting details. This is perfect for impressing potential clients while setting clear boundaries and expectations.
37. How Do I Protect My Photography Work?
To protect your images and ensure both you and your clients are clear on rights, always use a photography contract. A solid contract outlines the terms of usage, rights, and expectations for both parties, and helps avoid any misunderstandings.
Having a Product Photography Contract in place can protect your intellectual property, outline payment schedules, clarify delivery times, and detail image usage rights. This is essential for keeping your work secure, especially if you're working with brands or high-profile clients.
38. How Do I Build a Strong Portfolio?
A strong portfolio should showcase your best work and highlight your niche. Include a variety of shots that demonstrate your skills, and focus on quality over quantity. Update your portfolio regularly and ensure it aligns with the type of clients or projects you want to attract. Get more tips here on building a product photography portfolio.
39. How Do I Scale My Photography Business?
Scaling your business involves taking on more clients or increasing your service offerings. Consider expanding into new niches or geographical areas, hiring assistants or contractors to help with workload, and improving your marketing efforts. Additionally, streamlining processes with client management tools can save time and increase efficiency.

40. How Can I Optimize My Photography Website for SEO?
Optimizing your website for SEO (Search Engine Optimization) involves using relevant keywords, writing descriptive image alt text, and ensuring your site loads quickly. Regularly updating your content and blogging about photography topics will also help improve your site’s search engine ranking, making it easier for potential clients to find you.
41.How Do I Create a Pricing Strategy for My Photography Services?
Your pricing strategy should reflect your skill level, the value you offer, and your target market. Start by researching what other photographers in your niche charge and calculate your costs (equipment, software, time, etc.) to ensure your rates are competitive and sustainable. Consider offering tiered packages for different budgets. Here get the idea about our photography pricing highs and lows.
42. How Do I Handle Taxes and Legal Matters in My Photography Business?
Taxes and legal matters can be tricky. Keep track of your business expenses, set aside money for taxes, and file your returns on time. Consult with a tax professional to ensure you're taking advantage of deductions for photography-related expenses.
For legal matters, always use contracts, and consider obtaining business insurance to protect yourself and your equipment. You can dive deeper into tax-related topics by checking out our Photographer's Guide to Filing Taxes.
43. How Do I Manage My Photography Workflow from Shoot to Delivery?
A well-managed workflow improves efficiency and client satisfaction. Start with a clear product shoot checklist, organize your files immediately after the shoot, and use editing software with batch-processing capabilities to speed up post-production. Set realistic delivery timelines and keep the client informed at every step.
44. Why do I need a pitch deck as a photographer?
A pitch deck is essential for photographers looking to attract clients, collaborators, or investors. It allows you to clearly communicate your value proposition, showcase your portfolio, and demonstrate why potential clients or collaborators should choose your services. Pitch deck template is particularly useful for reaching out to brands, agencies, or larger companies who may want to work with you on future projects.
45. What should be included in a photography pitch deck?
Your photography pitch deck should include the following sections:
Introduction: Brief introduction about who you are and what you do.
Portfolio: Show your best work, highlighting different styles and types of photography you specialize in.
Your Unique Selling Point (USP): Explain what sets you apart from other photographers.
Client Testimonials or Case Studies: Highlight previous successful projects, client feedback, or collaborations.
Services & Pricing: A brief overview of the services you offer and your pricing structure.
Call to Action (CTA): Clear instructions on how the potential client can get in touch or book your services.
For inspiration, check out pitch deck examples in our blog article. Studying these examples can help you understand what works and how to structure your pitch to stand out from the competition.
Section 7: Common Mistakes to Avoid in Product Photography
Product photography requires precision, technique, and attention to detail. Even the most experienced photographers can make common mistakes that affect the quality of their images. Here, we’ll cover the most frequent issues and how to avoid them.
46. What Are the Most Common Mistakes in Product Photography?
Some of the most frequent mistakes in product photography include:
Overexposure:
This happens when the lighting is too intense, washing out the product details. It can make colors appear faded or overly bright. To avoid overexposure, always check your lighting setup and adjust your camera settings (like ISO, shutter speed, and aperture) accordingly.
Improper White Balance:
If the white balance is not set correctly, the colors of your product can appear unnatural, giving the photo a yellow or blue tint. Ensure you use the correct white balance setting for the light source you are working with, or manually adjust it in post-production.
Cluttered Backgrounds:
A busy or distracting background can take the focus away from your product. It’s important to use simple and clean backgrounds that let your product stand out. A solid color, a plain backdrop, or a minimalistic texture works best.
Bad Composition:
Composition issues like poor framing or not following the rule of thirds can lead to unappealing images. Make sure to compose your shot in a way that highlights your product's best features, ensuring it’s the central point of focus.
47. How Can I Avoid Blurry Product Images?
Blurry images can be a major issue, especially when you’re trying to showcase small details in your products. Here’s how to avoid them:
Use a Tripod: A tripod stabilizes your camera and prevents shaky hands from causing blur, particularly in low-light situations.
Shutter Speed: Use a faster shutter speed to freeze motion and avoid blurriness. A general rule is to use a shutter speed faster than the focal length of your lens (e.g., for a 50mm lens, use at least 1/50s).
Focus: Ensure your focus is sharp on the product. Use manual focus if needed to make sure the key details are crisp. Using a narrow aperture (higher f-stop) will also increase the depth of field, ensuring more of the product is in focus.
Image Stabilization: If you're shooting handheld, use a camera with image stabilization or use lenses with built-in stabilization to minimize blur.
48. How Do I Avoid Color Inconsistencies in My Product Photos?
Ensuring that your product photos accurately reflect the real-world colors of the items is crucial for building trust with customers. Here's how to avoid color inconsistencies:
Correct White Balance: As mentioned earlier, incorrect white balance can lead to unnatural color tones. Always set your white balance to match the lighting conditions, whether you're shooting in natural light or artificial lighting.
Use Color Calibration Tools: Calibrate your monitor regularly and use color calibration tools to ensure the colors on your screen are accurate when editing. This ensures what you see during editing is what the final image will look like.
Shoot in RAW: Shooting in RAW format gives you more flexibility to adjust colors in post-production without losing image quality. It also ensures that any changes you make to color settings are preserved without affecting the overall image quality.
Test Shots and Reference Images: Take test shots and compare the results with the product in real life to ensure that the colors match. If necessary, use reference images to guide you in achieving accurate color representation.
49. How Can a Product Photography Course Help Me Improve My Skills Over Time?
A Product Photography Course gives you a structured approach instead of relying on random practice or guesswork. It explains technical areas like camera settings, lighting basics, and strong composition in easy-to-follow steps.
You can practice hands-on assignments designed to fix real-world mistakes quickly and effectively. Our course specially includes feedback sessions and a community of photographers where you can get valuable advice from experienced photographers. Over time, you will build confidence, sharpen your creative vision, and produce consistently better product photographs.
50. Can a Product Photography Course Help Me Build a Strong Portfolio?
Yes, a Product Photography Course will help you create a polished and professional portfolio that attracts future clients. Courses teach you to shoot high-quality product images and select the right work to highlight your strengths.
You will learn how to create a variety of images that show your flexibility with different types of products. Instructor feedback will help you refine your images and only include your best, most impressive work in your portfolio.
Conclusion
This guide addresses the most common questions photographers face when entering product photography. By understanding these fundamentals, beginners can approach their work with greater clarity and professionalism. Use this resource as a foundation for building technical skills, improving results, and advancing your photography career.

More Articles

Learn how to train ChatGPT to understand your photography business, brand voice, and dream clients—so every prompt you use gets personalized, strategic results. A must-read for photographers using AI to book better clients.